A robot that can be controlled remotely using a real-time video feed.

The goal of this project was to be able to control a robot in a remote location in real time.
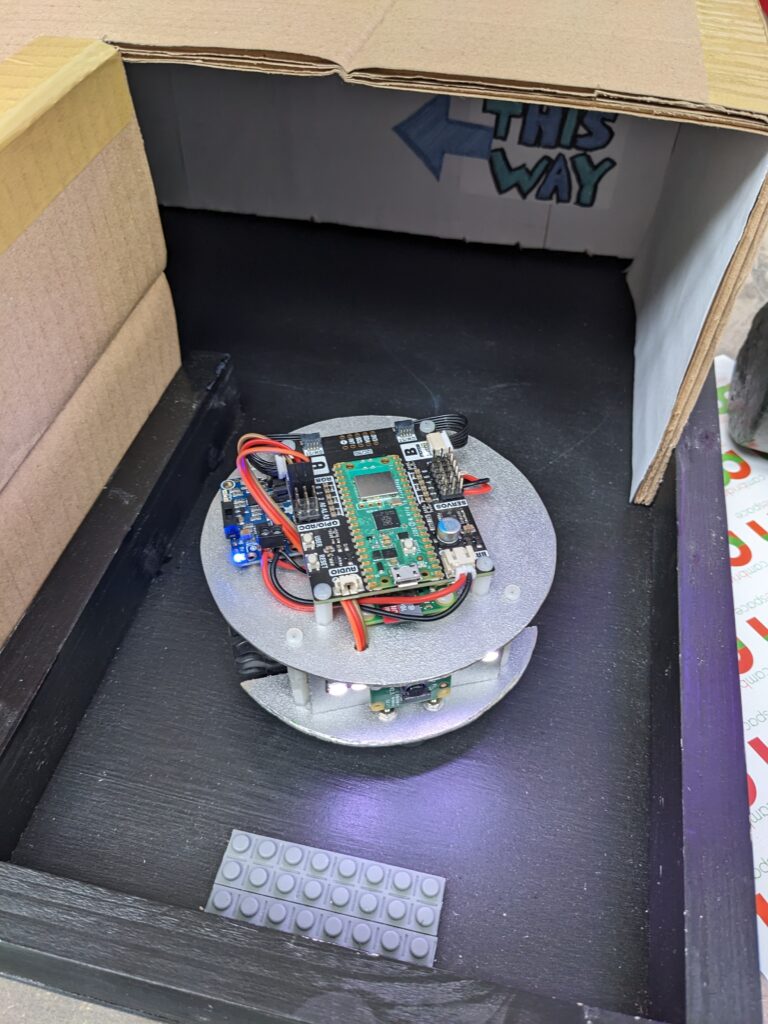
The robot
As I would be controlling this robot remotely, I needed to make it as easy to drive as possible and not require any manual intervention if it got itself into difficulties. The design I came up with was a circular robot with two wheels, which would always be able to spin on the spot to manoeuvre out of tight spots. I put ball casters on the front and back for support, which work well on flat, smooth surfaces (although they are not great on bumps). I used a Pimoroni Inventor 2040 W to control two micro metal gearmotors with encoders, which allow the motor speeds to be accurately controlled using feedback.
I also used a Raspberry Pi Zero W with a camera module, connected to the Inventor 2040 W via the UART, over which it could send commands to control the motors. This Pi also has onboard WiFi, which was used for the internet connection. I also added headlights in the form of a Blinkt! LED strip along the front of the robot to allow driving in the dark!
Power was provided by a 6600mAh Lithium Ion battery pack, using an Adafruit PowerBoost 1000 to provide the 5V supply for the Pi and Inventor 2040 W, while also allowing the batteries to be charged via USB while the robot remained powered.
I put this all together in a chassis cut from 2mm wooden sheets, glued together and spray painted silver. I used various sized M2.5 nylon standoffs and
Control
I needed to find a reliable way of communicating with the robot over the internet that would allow live video from the robot’s camera to be viewed, and commands to control the robot to be sent. For good control, it was important to minimise the feedback loop between the robot and the user:

Better control can be achieved by minimising the time taken for commands to take effect and the results to be visible on the video feed, so I needed to make sure that the controls responded quickly, and the video did not lag too much.
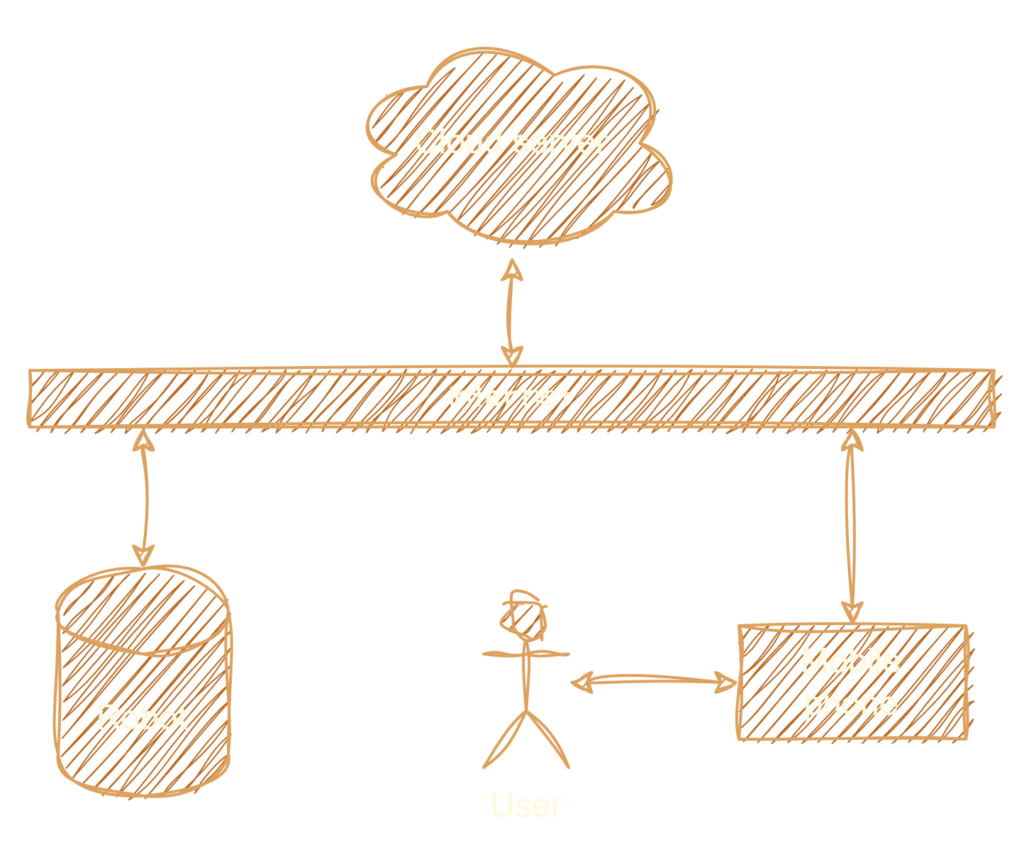
I decided to use WebRTC to communicate with the robot, since this would allow control from any device via a web browser, and supports video streaming. To allow a connection to be established between the robot and the user’s device, I needed to write a server to run in the cloud to manage these connections. I also needed to write a client to run on the Raspberry Pi, which I did using the Python aiortc library, and a JavaScript/HTML5 client to run on the user’s device (which can be a mobile phone or laptop with a web browser). The following represents an overview of the system:
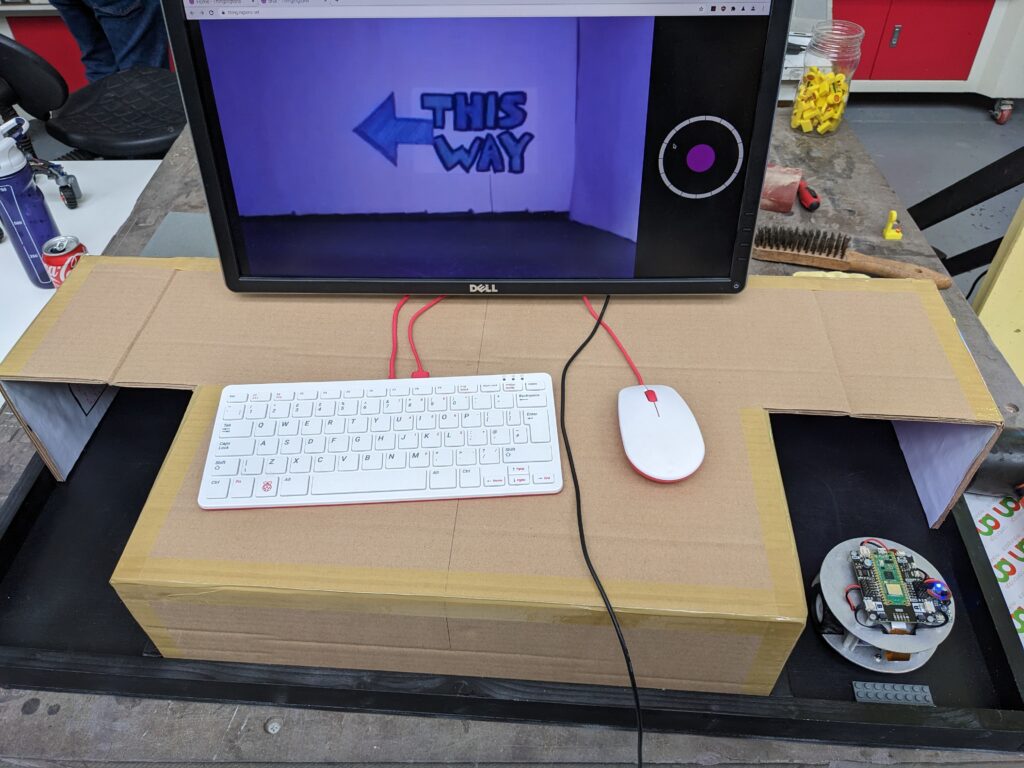
Testing it out at CamJam
To test out how easy it was to control the robot, I took it along as a “Show and Tell” to the Cambridge Rasperry Jam in April 2023, which was held at the Cambridge Makerspace, and invited people to try it out.
The setup was a simple maze course that I had built previously, to which I added a carboard cover so only the start and end points were visible. I added some helpful hints on the walls to show people which way to turn when inside the course.
I used a Raspberry Pi (obviously) as a controller and WiFi access point, with a screen to show the live camera view and keyboard for control. The screen could also show a QR code which allowed people to connect via their mobile phones.